Everyone loves an underdog don’t they?
Well as the results for Round 3 of a Call to Arms continue to trickle in, it’s becoming increasingly apparent that there are armies that are doing well and armies that are doing… less well. Ok – they’re doing shite.
At the time of writing we’re just coming to an end of round 3 and the armies with the lowest win ratios are;
- Free Dwarfs- 0% win rate
- League of Rhordia- 20% win rate
- Ratkin Slaves- 21% win rate
- Kingdoms of Men- 25% win rate
I’ve assembled a crack team of Kings of War experts to share their wisdom on how they would improve the chances of these plucky underdog armies. And by crack team I mean the Northern Kings, because they were all that was available.
To be fair as a group we have some pretty solid Kings of War credentials, between us we’ve won three UK Masters, three Clash of Kings champions, two Clash of Kings team awards and a win percentage of 74.2%. But who’s counting?
So the plan is to share a bit of advice about how we would approach the armies currently in the bottom four – some of these we have direct experience playing with, and some we don’t.
We’ll talk through an example list that we think would work well and how we would play it.
You could of course choose to totally ignore us and that’s fine too, we often have no idea what we’re actually talking about…
I’m up first talking about the stoic little buggers that just had to break free.
Free Dwarfs

Poor Free Dwarfs. At the time of writing this, they had played 10 games and had won precisely none. Their Imperial brothers weren’t doing much better, with only 4 wins out of 15 games but at least they had something!
I actually really like the Free Dwarf list and was surprised to see it floundering at the bottom of the table. Since the start of 3rd edition, I’ve always thought of Free Dwarfs as just ‘better’ Dwarfs. I know that we shouldn’t draw too many conclusions from one tournament that is only 50% complete, but the trend for them at the moment doesn’t look good.
I still think that there is a lot of potential here, so I’m going to share my (admittedly limited) experiences with the Free Stunties. At the start of lockdown I rediscovered an old shoe box in my garage full of Dwarf infantry. I’ve been slowly building and repainting the army in the hope of being able to field a full army by the time we’re allowed outside the play again. In preparation for that time, I’ve been having a fair few practice games on Universal Battle to help me decide what units I want to focus on painting – I’m up to a respectable 4 wins/ 2 draws/ 2 losses with the Free Dwarfs so they definitely do have the potential to win games.
This is the list I’m using at the moment;


The list makes use of a couple of nice elements to maximise the Free Dwarfs’ strengths and help mitigate some of their weaknesses.
Maximise the Strengths
Dwarfs and Free Dwarfs have access to some incredibly good value infantry units, with unit strength galore. I started building this list by adding the Shieldbreakers, Ironclad and Mastiff Packs first, knowing that with all of those I had an incredibly solid centre to my army. All of that combined came to just 1025 points – leaving me with 1275 points left to spend on the ‘toys’ that are going to do the big damage.
Because I had a good number of scoring units with high defence and high nerve, I felt comfortable putting so many points into units that don’t have any unit strength i.e. the Bezerker Lords and the Cannons. One big advantage of the Dwarfs is that their core units are so good at playing the scenario, they can really invest heavily into other elements of their list.
Every unit that can take a Throwing Mastiff has got one. I love these little buggers – you can either gang up on one target and do enough damage to take out a unit in one go, pick off chaff from afar or (and this is the use that people often miss) snipe out characters from behind lines. Throwing Mastiffs work best when employed on mass, so wherever possible only split your fire if there is a tactical reason to do so e.g. trying to waver rather than kill chaff.
If you have a shot with your Mastiffs, take it even if it’s not ideal. If you die or end up in combat before you can use the Mastiffs you’ve just wasted 15 points you could have spent elsewhere. Better to take a bad shot than no shot at all.
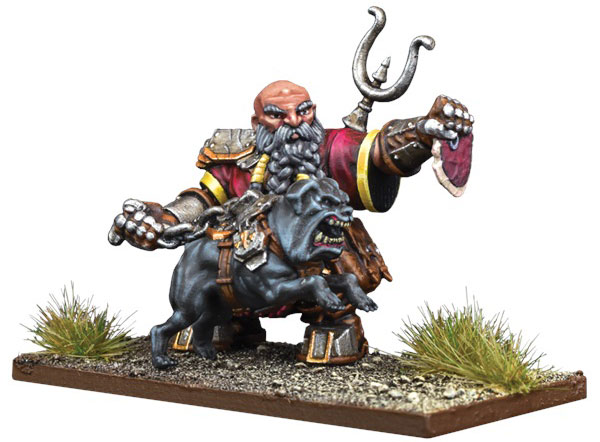
The Mastiffs pair up beautifully with the Pack Master. These are really excellent units, not only do they give all of the surrounding throwing Mastiffs vicious, but they also have what is effectively a short range, vicious Lightning Bolt (6) that doesn’t suffer from any modifiers. I like to tuck him away hidden behind a wall of height 2 infantry, chucking dogs out at anything he can see that’s taller than the guys in front of him. I’ve chosen to give mine the Inspiring Talisman as my list would be quite short on Inspiring otherwise, but the Sacred Horn is also a solid choice for him.
Mitigate the Weaknesses
Dwarfs are slow… really slow. -1 speed compared to most other infantry might not seem massive on paper, but on the table top it’s huge. This list does its best to try and mitigate the infantry’s slow speed, without going down the route of all Brock Riders.
The King on Large Beast and the Brock Riders add in a bit of much needed threat range. This means that faster armies can’t ‘stand off’ from the Dwarfs, refusing to commit or continuously push them back. Rather than play the Brocks out on the flank like I often see people doing, I’ve been including them in the centre of my lines meaning that nothing can ever move into range to threaten the Dwarfs without also being in range of the Brocks.

The stars of this list are the two Berserker Lords – one flying and one mounted and with Scout. These two have one job, to get behind the lines as quickly as possible and cause maximum disruption. Normally when playing against Dwarfs, the opposing players has the first couple of turns as free movement, where they can move around the board fairly unopposed because they’re well out of charge range of anything. The two Berserkers upset that, because one of them can threaten turn 1 charges and the other can cross the board in a turn. While they obviously can’t take on an entire army by themselves, they at least prevent your opponent from moving around totally unopposed. If you can charge soft targets without putting yourself at risk of reprisal, go for it. But don’t be afraid to forgo charging for a few turns if it means getting yourself in a position to be the biggest pain in the arse possible during the mid to late game.

They also pair up really nicely with…
The Cannons! Three war engines isn’t everyone’s cup of tea. In fact taking them makes me feel a bit nauseous myself – but its Dwarfs so its thematic right?
The three cannons and the Berserker Lords add so much to this list because it means that the enemy has to start moving towards you. If they hang back, they’re going to get picked off by a mixture of cannon fire and flying angry Berserker Lords. If they move forward, then they’re coming to you and mitigating some of your issues with low speed. The cannons also pair up really well with the Throwing Mastiffs – a cannon hit (plus its Shattering) can often be enough to push a unit torn apart by Mastiffs over the edge.
Plan Ahead
An ideal situation for this list is to get both Berserker Lords behind the enemy, the cannons firing at a high value target (e.g. a dragon), the Mastiffs Packs moving up to chaff the enemies charges and the rest of your lines advancing behind them, ready to unleash their Throwing Mastiffs.
Of course that is the ideal situation! The biggest threat that Dwarfs need to be careful of is high speed, high damage output units that can blow through your units in one go. If you’re facing an opponent like this, you need to accept that you’re going to lose units and have counter attacks set up to respond when you do. Dwarfs are slow and sometimes struggle to readjust their lines if something goes wrong, so you need to think ahead.
Another thing to be careful about is your Scout move with the Shieldbreakers. It’s nice to have the option, but don’t forget that just because you can Scout, it doesn’t mean that you should. If you’re not going to gain anything from it in the game, its often better to keep your Shieldbreaker hordes in line with your other units, rather than rushing out on their own.
Hopefully this inspires a few Free Dwarf generals and we see some big wins creeping in during round 4. Who knows, if I can tear myself away from my beloved Order of the Green Lady then I might just take the Free Dwarfs out myself next round and put my money where my mouth is!
Part 2 is current UK Master, Tom Robinson talking about one of his favourite armies, the League of Rhordia. Check it out here!

Don’t forget about Earth Elementals!!! They are really, really good!!! I did alright with free Dwarves at US Masters this year, so there’s hope!!!
LikeLike
Curious what everyone’s thoughts on Rangers are. I’ve heard good things, but I just don’t see it. The loss of headstrong really stung for these guys and I think they’re simply too expensive. I do think they would support shieldbreakers very well as you can have basically an entire battle line that scouts, has good shooting (mastiffs and xbows) AND is good in combat (especially if paired with craggoth?), but seems prohibitively expensive.
LikeLike
I’ve been experimenting with two troops of Rangers and really liking them. They’re have a very similar damage output to the regiment, but are a good chunk cheaper.
I was initially put off by the cost for a Def4 10/12 unit, but I found that they’re small enough to be ignored by a lot of enemies.
I tend to put them to the side of an Ironclad horde. They take pot shots all game and then charge the flank of anything that charges the Ironclad.
LikeLike